Written in front of the words: because rainysky has not been exposed to Linux and qt and opencv before, not to mention the transplant, and also encountered a lot of problems during the transplant process, but fortunately searched the various websites and enthusiastic users slowly solved At the same time, I also found that the basics of online speaking need some simple foundation. For beginners, it may be a bit unintelligible. Therefore, rainysky will transplant qt and opencv to zedboard step by step from the initial construction system. The whole set of simple tutorials is mainly for the first contact with the zedboard board, and is not very familiar with the Linux system. The process of writing may be a bit lengthy. I hope you will forgive me, but will use every command and every possible one in the process of establishing. I don't understand the pictures, I believe that as long as you follow this step by step, you can definitely achieve the goal you want. This series of blog posts mainly refer to the book "Based on Zynq Embedded System Collaborative Design", lazy rabbit blog, super sunny blog, unconventional blog, and of course some online blogs.
Generally do embedded development is developed under linux, but it is customary to install a linux virtual machine under the host. Rainysky's native system is win7 Ultimate 64-bit, and I don't want to change the system to install a virtual machine.
One: the required software resources (to ensure that the host can be networked)(1) VMware WorkstaTIon, rainysky uses VMware WorkstaTIon 9.0.1, in fact, the difference between the different versions is not very large, you can download according to the version you can download. (A certain network disk in the pit can not release the outer chain, after a section of the network disk is released under the outer chain)
(2) Linux system, rainysky uses ubuntu12.04, preferably this version, because different versions may have different problems, it is slightly troublesome to solve.
Second, the software installation(1) Needless to say, VMware installation is the usual software installation, but it needs to be restarted after installation.
VMware opens the interface as follows
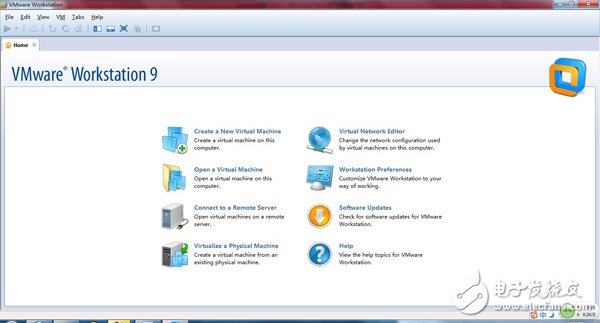
(2) Install unbutu virtual machine
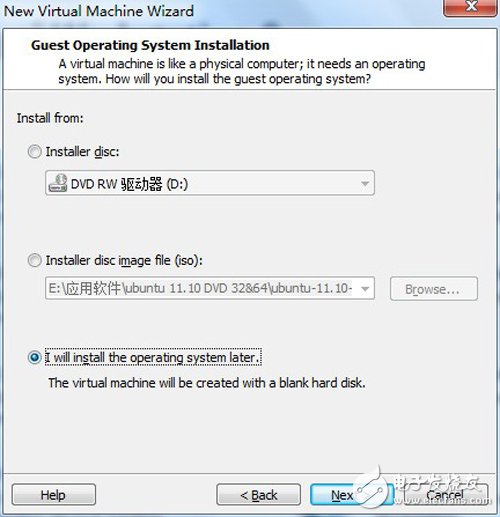
<1> Select file –> new virture machine. Pop-up window keeps the default (typical) click next, as follows
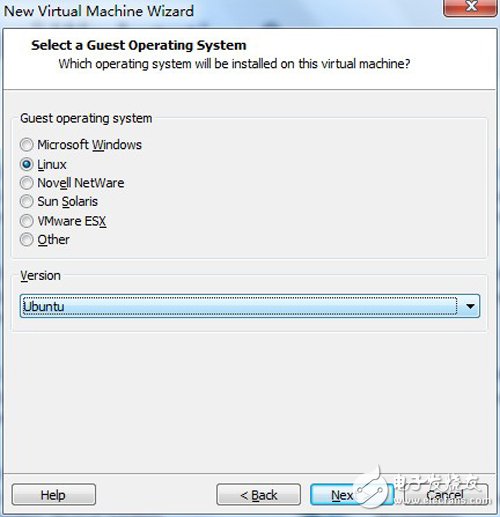
<2> In the next choice, choose linux version and choose ubuntu. You can also choose ubuntu64, but there may be individual problems, and rainysky has not tried it. In order to facilitate everyone to choose the same, as shown below
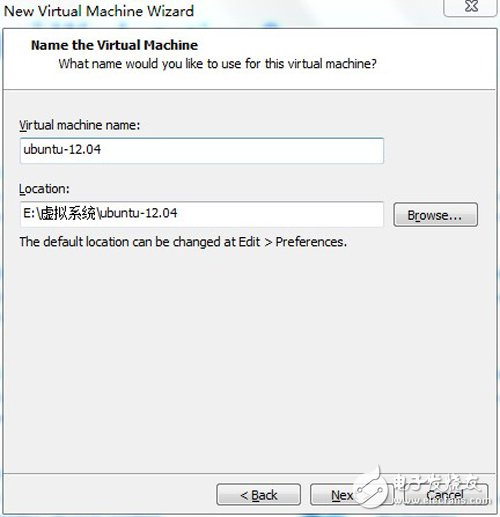
<3> The next step is the location of the ununtu12.04 installation. It is best to put the virtual machine under a folder, and leave enough space in the hard disk. The virtual machine name can also be defined by itself. Figure:
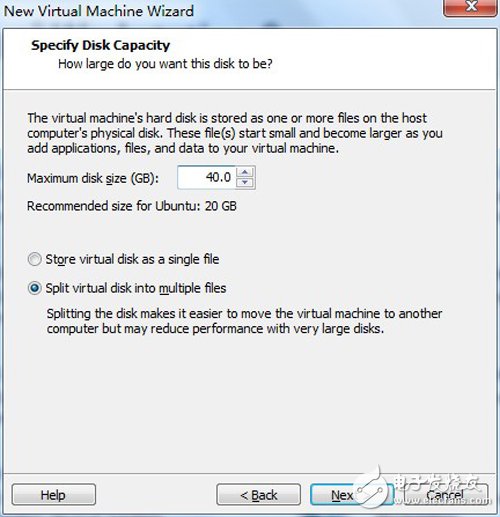
<4> Select the size of the hard disk, rainysky used to choose 40G, you can also choose the size according to the size of your own disk. Other options default:
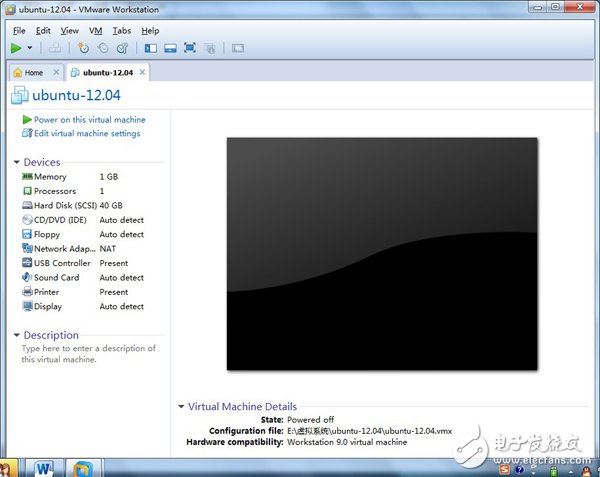
<5> Click next->finish. This is the establishment of the unbutu guide, and then you will put your system inside. As shown
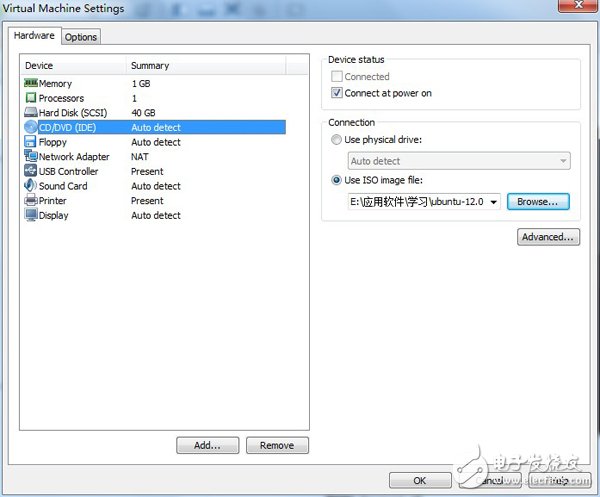
<6> Select VM->SetTIngs... In the pop-up dialog box, select CD/DVD (IDE), then select Use ISO image file on the right side, and select the iso file of your downloaded unbutu system in the following column. , and then click OK, as shown below: (You can also set the size of the memory (memory) here, the default is 1G, if your host memory is enough, the recommendation is also 1G)
<7> Click on Power on this virtual machine, you can follow the unubtu system, is it the same as installing the system in peacetime. Down is some configuration options for the rainysky installation system.
<8> The first one you encountered when installing was to choose a language. Because rainysky's English is a bit of anxious, choose Chinese (Simplified) and click Install Ubuntu.
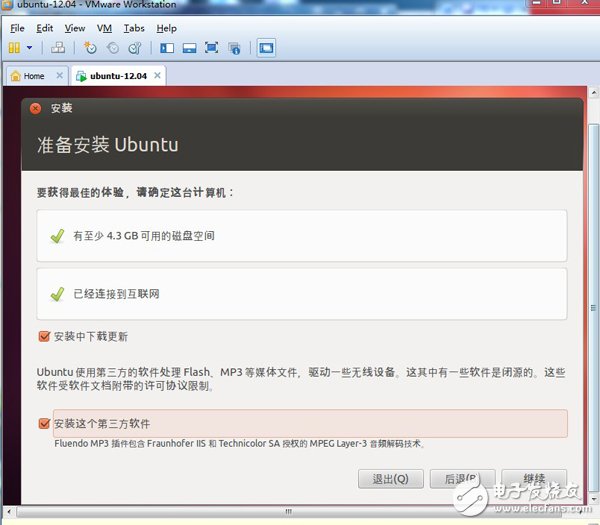
<9> Next is a choice, rainysky is relatively lazy, hard disk and memory are relatively more than enough, they are all hooked, as shown below: choose to continue to install
<10> Select to clean the entire disk and install Ubuntu, then continue and install. Choosing the time zone, I chose Shanghai, it doesn't matter. The default keyboard (Chinese), the next is your own user name, personal habits are as follows
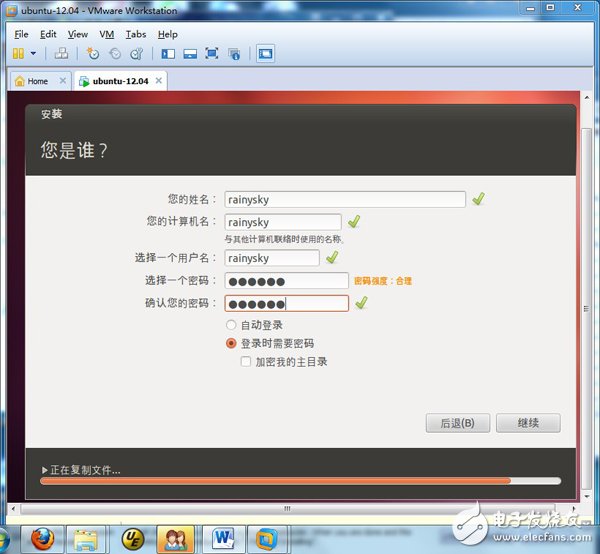
<11> Click to continue, just wait for the system to automatically install it, it seems that it takes a long time. Wait patiently (I don't know how to do it, this time the network speed is quite weak, rainysky is quite depressed for 2 hours). Once installed, choose to start immediately. Just fine.
PET Anti Blue Light Film is a product designed specifically to protect the eyes. With the popularization of electronic products, we are exposed to a large number of electronic screens every day, such as mobile phones, computers, tablets, etc. The blue light emitted by these devices poses a potential threat to our eye health. Therefore, we urgently need a solution that can effectively reduce the harm of blue light to the eyes.
The PET Anti Blue Light Film is made of high-quality PET material with excellent durability and transparency. It can be attached to various electronic screens, such as mobile phones, tablets, televisions, etc., providing users with comprehensive eye protection.
The main feature of this PET Anti Blue Light Film is its anti blue light function. It can filter out harmful blue light emitted by electronic devices and reduce eye fatigue and dryness. At the same time, it can effectively reduce the damage of blue light to the retina and prevent the occurrence of eye diseases.
PET Anti Blue Light Film also has excellent optical performance that does not affect the display effect of the screen. It can effectively reduce screen reflections and glare, providing a clearer and more comfortable visual experience. In addition, it also has anti fingerprint and anti scratch functions to protect the screen from damage during daily use.
Installing PET Anti Blue Light Film is very simple, just clean the screen surface and stick it onto the screen. It has good adhesion and will not produce bubbles or peel off after prolonged use. At the same time, it is also easy to clean, just gently wipe it with a soft cloth.
Pet Anti Blue Light Film,Blue Light Screen Protector,Anti Blue Light Screen Protector,High Quality Laptop Screen Protector
Guangdong Magic Electronic Limited , https://www.magicmax.cc