Everyone who comes into contact with the PID knows the formula of the PID:

Then according to this formula, you can compile the arduino program that calculates the output as follows:
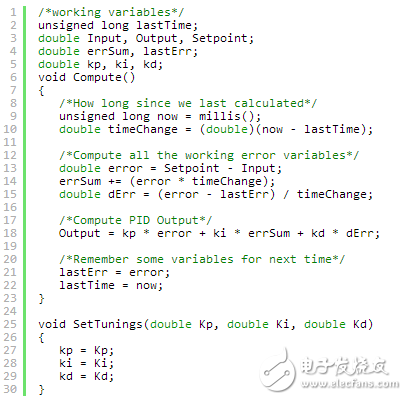
Note: The program source code can be copied on the original text.
However, in the above program, two problems arise when the PID is called irregularly:
1. Sometimes the call is made regularly, and sometimes the call is stopped, and the continuous stable feature of the PID will not be obtained.
2. Additional mathematics for points and differentials is required because they are all closely related to time.
Solution: Ensure that the PID is called within a fixed time interval. I call the compute function by the preset sampling time in each cycle. The PID then decides whether to calculate or return the value immediately. Once we know that the PID is called within a fixed time interval, the calculation of the integral and differential can be simplified.
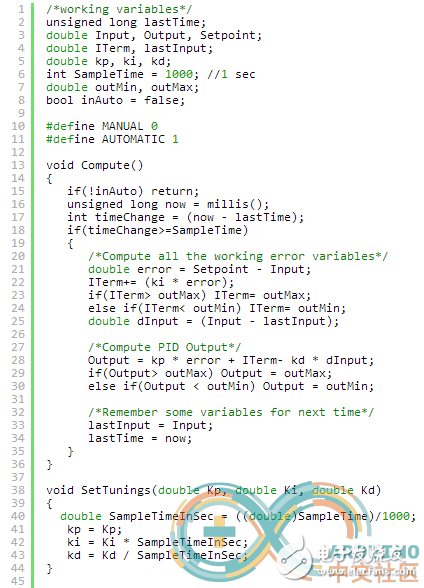
So our program becomes:

The gray part is the newly added statement.
In this new program, the author converts time to seconds on line 29. This simplifies the operation. At the same time, the new two functions are added to convert the PID parameters into seconds-based parameters.
When the above PID program is running, there may be a problem of differential overshoot.
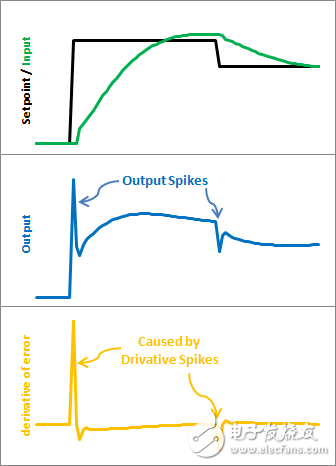
Looking at the above diagram, because error=Setpoint-Input, as long as the Setpoint changes, it will cause a sudden change in the value of error. The mutation of this differential value in the differential operation is infinite.
Solution:
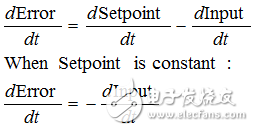
So our program becomes:
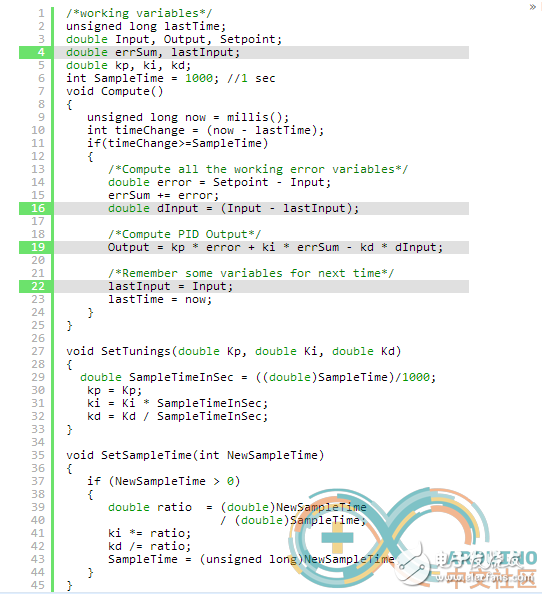
We can see that we just replaced +dError with -dInput.
When our PID is running, changing the parameters of the PID at this time will cause the output to change, such as:

We just cut the value of ki by half and the output by half. Why is this so? The reason can be found in the integral formula below:
This explains why the system has been working very stable before KI has changed. Suddenly, you multiply the sum of the new KI values ​​and the previous deviations. The changes brought about by this are not what we hope for. We only want to change and move in the direction we want.
Solution: There are many ways to solve it. The method I used in the latest Arduino PID library is to re-adjust errSum (the sum of deviations). When KI becomes twice the original, errSum is half of the original, although this method is a bit Clumsy, there are more sensible ways below. This method requires basic algebra based or computational skills.
Multiplying KI into it, although it doesn't seem to change, we will see that this small change brings a big difference. Now we multiply error and Ki. And save the product sum, when Ki changes, there will be no big change at this time, because the product and value of the previous KI has been stored.
So our program becomes:
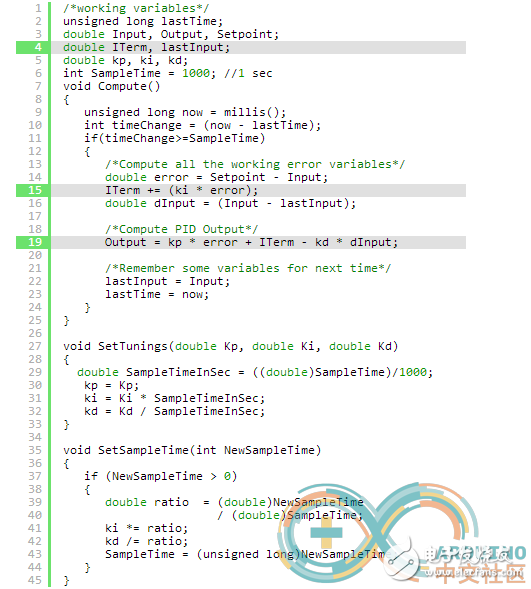
In this way, we change the parameters and the output will not change much.

This post was last edited by the fold in 2015-4-13 19:17
When our PID is running, sometimes it will happen. Figure:
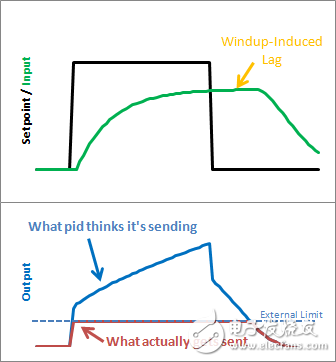
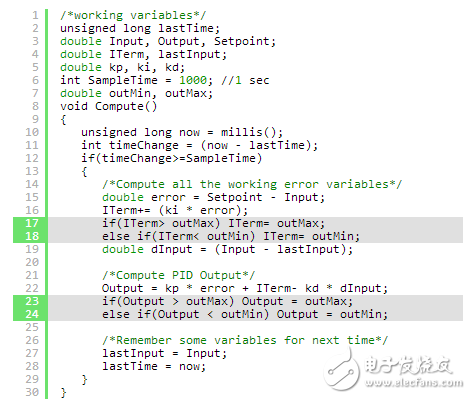
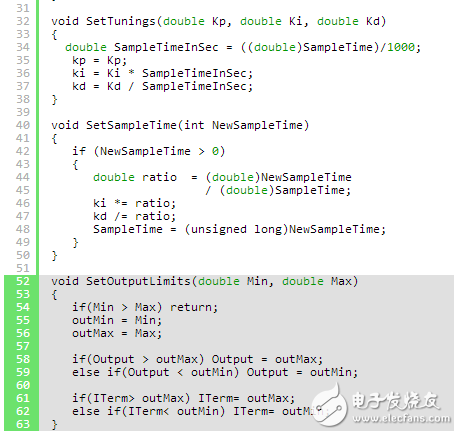
This happens when the PID thinks it can do something that it can't actually do. For example, the maximum output is only 255, but the PID output is 300. The reason is that the PID does not know that the maximum output can only be 255. So we add some restrictions to the PID output value in the program. Tell the PID what the maximum value can be output. Our program becomes:
When you do, you don't need to use the PID to calculate the output value, you want to use the value you set. (For example, if you want the output to be 0), your program might write like this:
Void loop()
{
Compute();
Output=0;
}
In this case, the program always outputs 0 regardless of what the PID wants to output. This will make the PID very confusing: "I tried to change the output, but nothing happened. What should I do? I will increase the intensity of the change." Thus, when you stop using the value you set as the output, When the PID is reused as an output. The PID output has a large value, so the system is messed up.
So we have to add a switch in the program, when we use the value we set, turn the PID off, not let it calculate.
Our program becomes:
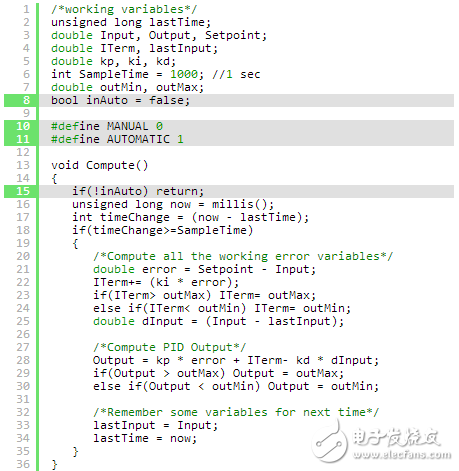
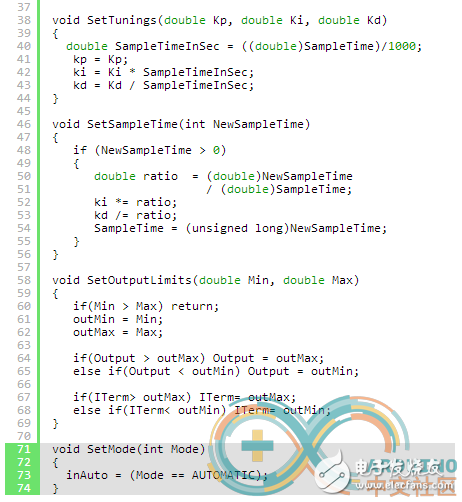
In the above program, we added a switch to the PID, but when we turn the PID switch on and return to the PID, the following happens:
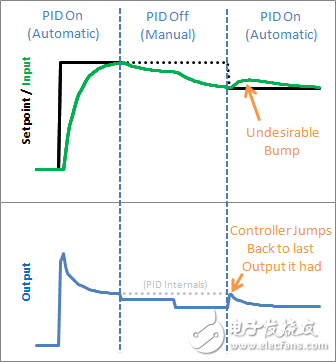
That's right, the output value of the PID will jump back to the last output value it sent. And adjust yourself from that value.
So when the switch is reopened, we need an initialization function to reinitialize the data, first look at the program:
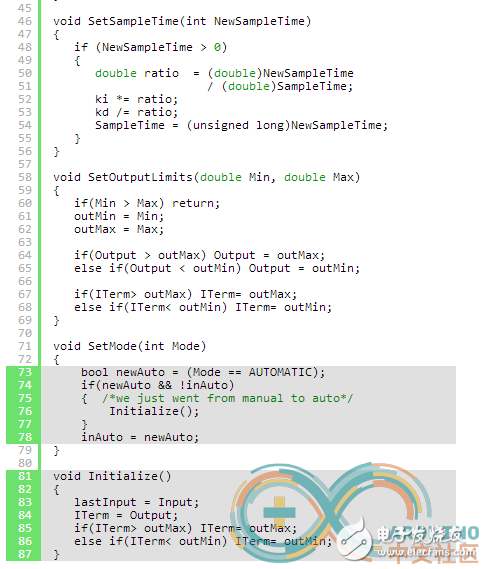
It can be known that when changing the mode, the IniTIalize() function is executed, the value of lasTInput is updated to the current sample value, and the value of ITerm is updated to the value of output, thus avoiding the jump when the PID is executed for the first time. It is.
Description:
This mining rig has been designed from the ground up to keep GPUs cool with 5 powerful cooling fans.
You can install 8 GPUs at the same time without worrying about heat dissipation.
Its a stable machine thats incredibly easy to set up and requires little maintenance, making it an ideal rig for mass scaling.
Item Name: 8 GPU PC Case
Material: SECC
Color: Silver
Size: 750*400*179mm
Motherboard type: ATX/M-ATX/Mini ATX
Power supply: Support ATX PSU*1
Graphics card type: Support 9 33cm long graphics card
Number of graphics cards: 8 GPU
Number of fans: 4
Specifications:
Type: Vertical
Feature: With fan
Style: With Side Panel Window
Application: Server
Applicable graphics card: GPU P104,GPU P106,GPU 1660,GPU 3060,GPU 3070,GPU 3080,GPU 580,GPU 598, GPU 5600XT,GPU 5700XT
build mining rig,pre built mining rig,mining rig sale,prebuilt mining rig,mining rig frames
Easy Electronic Technology Co.,Ltd , https://www.yxpcelectronicgroups.com