Certification: CE, C-tick, FCC, GS, LVD, PSE, RoHS, SAA, UL
Beam Angle: 120°
LED Chips: Epistar
Product Name: LED Tri-Proof Light
LED Chip: SMD2835
Shape: Rectangle
PF: >0.95
IP Grade: IP65
Trademark: Cresealight
Transport Package: Pearl Foam Inner Box and K=K Carton
Specification: 20W 30W 40W 50W 60W 80W
Origin: Made in China
HS Code: 9405409000
Product  Description:Input: AC 100-270V, 50-60HZ
Driver: lifude OSRAM, Meanwell or other options
Reflector: MCPCB or High temperature resistant PCB for your option
Body and diffuser could meet the IK08, and 850 degree glow wire test requirement
Perfect replacement for the whole set of T8 fluorescent Luminaire.
Save uo to 60% in electricity consumption compared to fluorescent lighting fixture
Lifetime:50000hrs, Warranty: 5 years
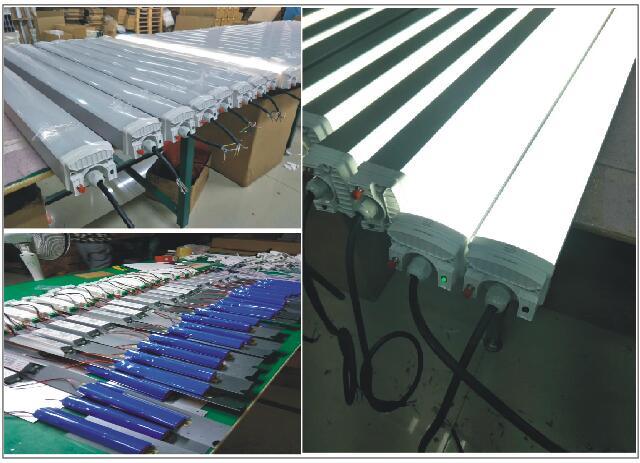
It could be with sensor (turn on/off sensor, dim sensor), emergency kit.
suitabel for supermarket, Â underground parking, warehouse, function well in waterproof and dustproof, suitable for outdoor and wet location lighting application
Techinical Parameters:
Specifications:Â Â
| Model | Power | CCT(K) | Beam angle | Working Voltage |
| 600 | 20W/30w | 3000K/4000K/5000K | 180° | AC100-277V /AC200-240V |
| 900 | 30W/40w | 3000K/4000K/5000K | 180° | AC100-277V /AC200-240V |
| 1200 | 40W/50w/60W | 3000K/4000K/5000K | 180° | AC100-277V/ AC200-240V |
| 1500 | 50W/60W | 3000K/4000K/5000K | 180° | AC100-277V/ AC200-240V |
| 1500 | 80W | 3000K/4000K/5000K | 180° | AC100-277V/ AC200-240V |
 Â
 

Hook installation steps:Â
1. Cut off power before operation.
2. Knowing the inside diameter of the luminaires then Choose suitable hook for the luminaires.
3. Fix the hook before installation and make the it can bear over 3 times weight of the lamp
4. Connect the lamp with hook and make it is safe.
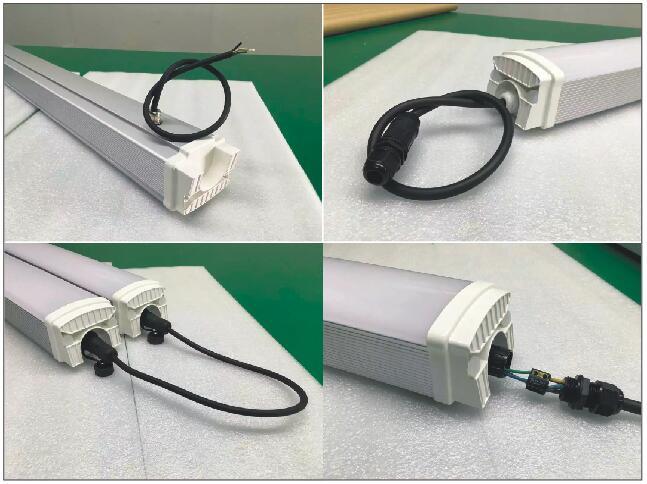
5. Connect the power wire:Brown,"L",connect to LIVE; Blue, "N",connect to NEUTRAL; Lime-green,connect to EARTH/GROUNDÂ
6. Light up the luminaires!
Bracket installation steps:Â
1. Cut off power before installation.
2. Measure the hole size on the holder,choose suitable screw.
3. Fix the screw at the place where luminaires will be installed and it should can bear over 3 times the weight of the luminaires
4. Screw up the screws at both sides of holder, then connect the hold hole with screws, tighten it up.
5. Connect the power wire:Brown,"L",connect to LIVE; Blue, "N",connect to NEUTRAL; Lime-green,connect to EARTH/GROUNDÂ Â Â
6. Light up the luminaires ! Â
Attention
Lamp must be vertical suspension and the supporter should can bear at least 3 times weight of the lamp. Â
Application
1. factories, industrial production workshop, warehouse;
2. gym, stadiums, golf courses,
3. commercial establishments, overpasses, outdoor advertising board, landmarks;
4. stage, yard, garden, lawn, park, plaza;
5. supermarket, shopping mall, exhibition hall;
6. ships, airports, subways, gas station, the train station, highway toll station, dockÂ
7. factory, office, meeting room, conference hall, storeroom, etc.Â
Packaging & Shipping
Packaging: carton for strong protection
Shipping  : 3-5 for samples, 5-15 for all items, DHL UPS EMS others are available.
User Manual:
Installation must be on more than 30kg load ceiling
Switch off power of the mains supply or respectively of the connection lead before doing any works.
Assembly must not damage or destroy conducting paths.
Make sure that the product is mounted on a stable, even and tilt-fixed background.
The complete installation must be done by an electrical expert who is familiar with the valid directives.
Quaity Control:Â Â
Stability TEST: make sure 100% of the lamps be aging test at least 48hours Â
Lighting TEST:Â make sure 100% of the lamps be lighted before packing
Drop TEST: make sure every single light have been well protected by box
Contact:
Lisa Jin
Mobile:0086-158 1858 6160
Please feel free to send us your inquiry, We are at your service any time! Product  Description:
Input: AC 100-270V, 50-60HZ
Driver: lifude OSRAM, Meanwell or other options
Reflector: MCPCB or High temperature resistant PCB for your option
Body and diffuser could meet the IK08, and 850 degree glow wire test requirement
Perfect replacement for the whole set of T8 fluorescent Luminaire.
Save uo to 60% in electricity consumption compared to fluorescent lighting fixture
Lifetime:50000hrs, Warranty: 5 years
It could be with sensor (turn on/off sensor, dim sensor), emergency kit.
suitabel for supermarket, Â underground parking, warehouse, function well in waterproof and dustproof, suitable for outdoor and wet location lighting application
Techinical Parameters:
Specifications:Â Â
| Model | Power | CCT(K) | Beam angle | Working Voltage |
| 600 | 20W/30w | 3000K/4000K/5000K | 180° | AC100-277V /AC200-240V |
| 900 | 30W/40w | 3000K/4000K/5000K | 180° | AC100-277V /AC200-240V |
| 1200 | 40W/50w/60W | 3000K/4000K/5000K | 180° | AC100-277V/ AC200-240V |
| 1500 | 50W/60W | 3000K/4000K/5000K | 180° | AC100-277V/ AC200-240V |
| 1500 | 80W | 3000K/4000K/5000K | 180° | AC100-277V/ AC200-240V |
 Â
 

Hook installation steps:Â
1. Cut off power before operation.
2. Knowing the inside diameter of the luminaires then Choose suitable hook for the luminaires.
3. Fix the hook before installation and make the it can bear over 3 times weight of the lamp
4. Connect the lamp with hook and make it is safe.
5. Connect the power wire:Brown,"L",connect to LIVE; Blue, "N",connect to NEUTRAL; Lime-green,connect to EARTH/GROUNDÂ
6. Light up the luminaires!
Bracket installation steps:Â
1. Cut off power before installation.
2. Measure the hole size on the holder,choose suitable screw.
3. Fix the screw at the place where luminaires will be installed and it should can bear over 3 times the weight of the luminaires
4. Screw up the screws at both sides of holder, then connect the hold hole with screws, tighten it up.
5. Connect the power wire:Brown,"L",connect to LIVE; Blue, "N",connect to NEUTRAL; Lime-green,connect to EARTH/GROUNDÂ Â Â
6. Light up the luminaires ! Â
Attention
Lamp must be vertical suspension and the supporter should can bear at least 3 times weight of the lamp. Â
Application
1. factories, industrial production workshop, warehouse;
2. gym, stadiums, golf courses,
3. commercial establishments, overpasses, outdoor advertising board, landmarks;
4. stage, yard, garden, lawn, park, plaza;
5. supermarket, shopping mall, exhibition hall;
6. ships, airports, subways, gas station, the train station, highway toll station, dockÂ
7. factory, office, meeting room, conference hall, storeroom, etc.Â
Packaging & Shipping
Packaging: carton for strong protection
Shipping  : 3-5 for samples, 5-15 for all items, DHL UPS EMS others are available.
User Manual:
Installation must be on more than 30kg load ceiling
Switch off power of the mains supply or respectively of the connection lead before doing any works.
Assembly must not damage or destroy conducting paths.
Make sure that the product is mounted on a stable, even and tilt-fixed background.
The complete installation must be done by an electrical expert who is familiar with the valid directives.
Quaity Control:Â Â
Stability TEST: make sure 100% of the lamps be aging test at least 48hours Â
Lighting TEST:Â make sure 100% of the lamps be lighted before packing
Drop TEST: make sure every single light have been well protected by box
Contact:
Lisa Jin
Mobile:0086-158 1858 6160
Please feel free to send us your inquiry, We are at your service any time!
Classical LED High Bay Light,LED High Bay Light,Industrial LED High Bay Lighting
LED High Bay Light Co., Ltd. , http://www.nsfloodlight.com